
How to choose exhibit layout for trade show: the complete guide for 2026
- Mar 22
- 7 min read
What you will learn
What the main trade show exhibit layout types are and how each one performs
How booth size, location, and goals should drive your layout decision
What design strategies maximize foot traffic and visitor engagement
How to optimize your layout for product display, networking, or branding goals
The most common layout mistakes that cost exhibitors leads and visibility
How to future-proof your exhibit layout so it evolves with your brand
Why exhibit layout is one of your most important decisions
Before your staff say a single word, before anyone reads your graphics, your exhibit layout is already communicating something to every attendee who walks past. A well-planned layout invites people in, guides them naturally through your space, and creates the conditions for real conversations. A poorly planned one creates confusion, blocks traffic, and wastes every dollar spent on design and production.
Choosing the right trade show exhibit layout is not just an aesthetic decision. It directly affects visibility from the aisle, traffic flow inside your booth, your staff's ability to engage visitors, and ultimately the number of qualified leads you walk away with.
📸 Recommended image: aerial view of a trade show floor showing different booth configurations including inline, corner, peninsula, and island layouts
The main trade show exhibit layout types
Understanding your layout options is the foundation of smart booth planning. Each configuration comes with its own visibility profile, design freedom, and budget implications.
Inline booth layout
The inline booth is the most common configuration at US trade shows. It sits in a row alongside other exhibitors with a single open side facing the aisle. Most inline booths measure 10x10 or 10x20 feet and come with height restrictions on side walls to preserve sightlines.
Inline layouts are the most budget-friendly option and work well for brands with a focused message and a compact product range. The main challenge is standing out in a long row of similarly shaped spaces, which makes strong trade show booth graphics and vertical design elements essential.
Corner booth layout
A corner booth occupies the end position of an inline row, giving you two open sides facing perpendicular aisles. This doubles your visibility and natural foot traffic without the cost of a larger configuration.
Corner positions are excellent for brands that want more exposure than a standard inline but are not yet ready to invest in a peninsula or island layout.
Peninsula booth layout
A peninsula booth sits at the end of a row and opens onto three sides, with only the back wall shared with another exhibitor. This configuration offers significantly more design freedom, greater visibility from multiple directions, and space for more complex layouts including demo zones and meeting areas.
Peninsula layouts are a strong choice for mid-to-large brands that exhibit regularly and want a commanding presence without the full investment of an island booth.
Island booth layout
An island booth sits entirely in the middle of the show floor with all four sides open to aisle traffic. It is the most visible, most flexible, and most premium configuration available. Island booths typically start at 20x20 feet and have the fewest restrictions on height and structure, making them the natural choice for custom trade show exhibits and brand immersion experiences.
For high-end brands investing in a fully custom build, the island format unlocks the full potential of architectural design, hanging signage, multi-zone layouts, and hospitality areas.
Exhibit layout comparison by booth type
Layout type | Open sides | Typical size | Best for | Relative cost |
Inline | 1 | 10x10 to 10x20 ft | First-time exhibitors, focused brands | Low |
Corner | 2 | 10x10 to 10x20 ft | Brands wanting more visibility on a budget | Low to medium |
Peninsula | 3 | 10x20 to 20x20 ft | Regular exhibitors, mid-range brands | Medium to high |
Island | 4 | 20x20 ft and above | Premium brands, flagship events | High |
All cost references are relative estimates only. Actual pricing varies significantly depending on show location, booth materials, and design complexity.
Key factors to consider when choosing your exhibit layout
Your booth goals
Every layout decision should start with the question: what does this booth need to achieve? A layout optimized for trade show booth layout for product display looks very different from one designed for networking or brand awareness. Define your primary objective first, then let that drive your spatial choices.
Lead generation requires open access, clear sightlines, and multiple staff engagement points
Product demonstration needs dedicated zones with enough space for visitors to gather
Networking benefits from semi-private meeting areas and comfortable seating
Brand awareness prioritizes visual impact, vertical height, and graphic coverage
Your booth size and location on the floor
The square footage you have and where your booth sits on the floor are the two most concrete constraints on your layout. A trade show booth layout for small spaces demands ruthless prioritization every element must earn its place. A larger island format gives you room to create distinct zones for different visitor journeys.
Location matters enormously. A booth near the main entrance, a feature stage, or a food area will receive significantly more passive traffic than one in a back corner. Factor in your floor position when deciding how much of your layout to dedicate to passive attraction versus active engagement.
Traffic flow inside the booth
The most effective layouts guide visitors through a natural progression. Think of your booth as having three zones:
An attraction zone visible from the aisle that stops people and draws them in
An engagement zone where visitors interact with products, demos, or digital content
A conversion zone where deeper conversations and lead capture happen away from the main flow
Avoiding furniture barriers at the entrance, keeping pathways wide enough for two people to pass comfortably, and placing your most compelling visual element at the back of the booth rather than the front are all proven strategies for maximizing dwell time.
For a deeper look at how design choices affect visitor behavior, read our full guide on how to make your trade show booth stand out.
📸 Recommended image: top-down floor plan diagram of a 20x20 island booth showing three distinct zones: attraction, engagement, and conversion
Layout optimization tips by objective
For maximum foot traffic : Place an attention-grabbing element such as a video wall, live demo, or oversized product display at the aisle-facing perimeter. Use height to your advantage with hanging signs or tall branded towers visible from across the hall.
For product display : Dedicate one full wall or central island to your product range. Use shelving, pedestals, or transparent cases at different heights to create visual depth. Keep the approach path wide and uncluttered so visitors can browse freely.
For networking and relationship building : Incorporate a semi-enclosed lounge or meeting area away from the main traffic flow. Low seating, a table, and subtle acoustic separation create a space where longer conversations feel natural and private.
For branding impact : Maximize graphic coverage on every available surface. Use consistent brand colors, large-format imagery, and a single dominant message at eye level. Lighting focused on branded elements reinforces premium positioning instantly.
To understand how professional exhibition stand companies approach layout planning across different brand categories, read our dedicated guide on top exhibition stand companies.
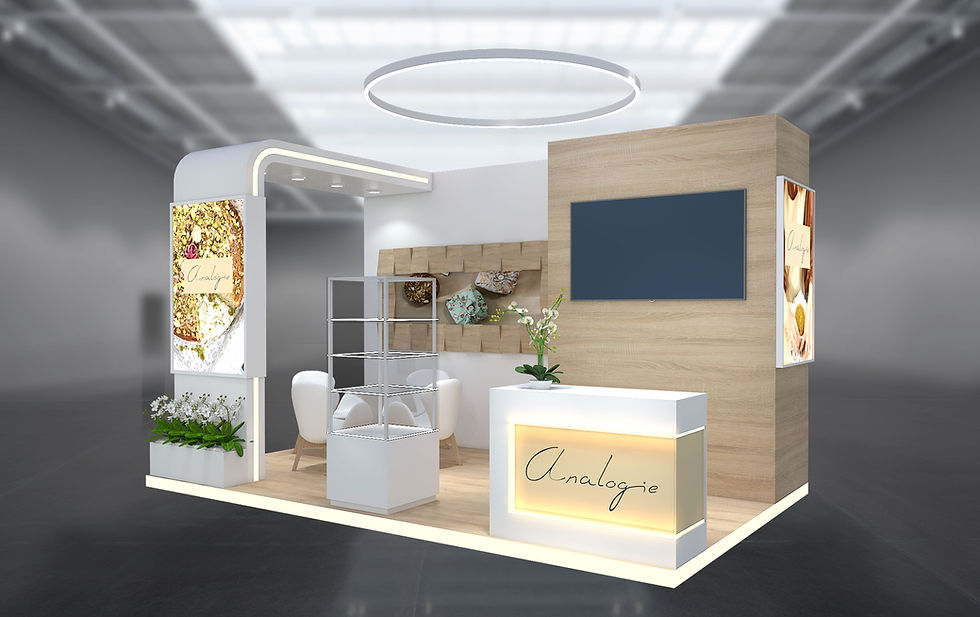
📸 Recommended image: interior of a premium island booth showing clearly defined zones for demos, meetings, and product display with consistent branded lighting
Common exhibit layout mistakes to avoid
Even experienced exhibitors make these errors repeatedly. Avoiding them is one of the fastest ways to improve your trade show results.
Blocking the entrance with furniture or staff is the single most common mistake. It creates an invisible barrier that stops visitors from stepping inside. Keep entrances open and position staff to the sides.
Overcrowding the space with too many products, graphics, or elements creates visual noise that overwhelms visitors. Prioritize ruthlessly and leave enough breathing room for the space to feel premium.
Ignoring storage leads to cluttered counters, visible boxes, and a disorganized appearance by day two of the show. Always design dedicated storage into your layout from the beginning.
Choosing furniture that interrupts circulation makes your booth feel difficult to navigate. Scale every piece to your footprint and test the layout before the show opens.
Committing to a rigid layout that cannot evolve limits your long-term flexibility. Modular systems that can be reconfigured between events are a smart investment for brands planning to exhibit regularly.
What to remember
Your exhibit layout directly determines visibility, traffic flow, and lead conversion before a single conversation happens
Choose your layout type based on open sides, budget, and brand ambitions inline for simplicity, island for maximum impact
Always plan your space around three zones: attraction, engagement, and conversion
Optimize layout decisions according to your specific goal whether that is product display, networking, or brand visibility
Avoid the most common mistakes by keeping entrances open, building in storage, and designing for traffic flow first
Future-proof your investment with modular components that can be reconfigured as your event program grows
FAQ - how to choose exhibit layout for trade show
What is the best exhibit layout for a 10x10 trade show booth?
For a 10x10 space, keep the layout simple and open. Use a strong graphic backdrop, one reception counter positioned to the side, and a focused product display or demo station. Avoid furniture that fills the center of the space and always leave the entrance fully open.
How do I choose the right exhibit layout for maximum foot traffic?
Position your most visually compelling element at the aisle-facing edge of your booth. Use vertical height with towers or hanging signs, keep all entrances fully open, and place interactive elements deep enough in the space that visitors have to step inside to engage with them.
What is the difference between a peninsula and an island booth layout?
A peninsula booth has three open sides and shares one back wall with an adjacent exhibitor, while an island booth sits independently with all four sides open to aisle traffic. Island layouts offer the most design freedom and visibility but require a larger space and higher investment.
How should I plan my trade show booth layout for product display?
Dedicate a full wall or central feature to your product range with varied display heights. Use shelving, pedestals, or transparent cases to create visual depth, and ensure the approach path stays wide and unobstructed so visitors can browse comfortably without feeling crowded.
What are the most common mistakes in trade show exhibit layout planning?
Blocking the entrance with furniture or staff, overcrowding the space with too many elements, forgetting dedicated storage, and choosing a rigid layout that cannot adapt between events. Plan for traffic flow and visitor experience first, then layer in branding and product elements.
How far in advance should I finalize my trade show exhibit layout?
Ideally at least three to four months before the event for custom or modular builds. This allows time for design revisions, production, graphics printing, and logistics coordination without rush fees or compromises on quality.
Comments